Setup Okta with Consent Kit
Help setting up Okta with Consent Kit SAML SSO
Setup your SAML integration in Okta
- In Classic UI view go to Applications > Add Application > Create New App
- Create a new application integration selecting Web and SAML 2.0
- In General settings - optionally get a copy of our logo to upload
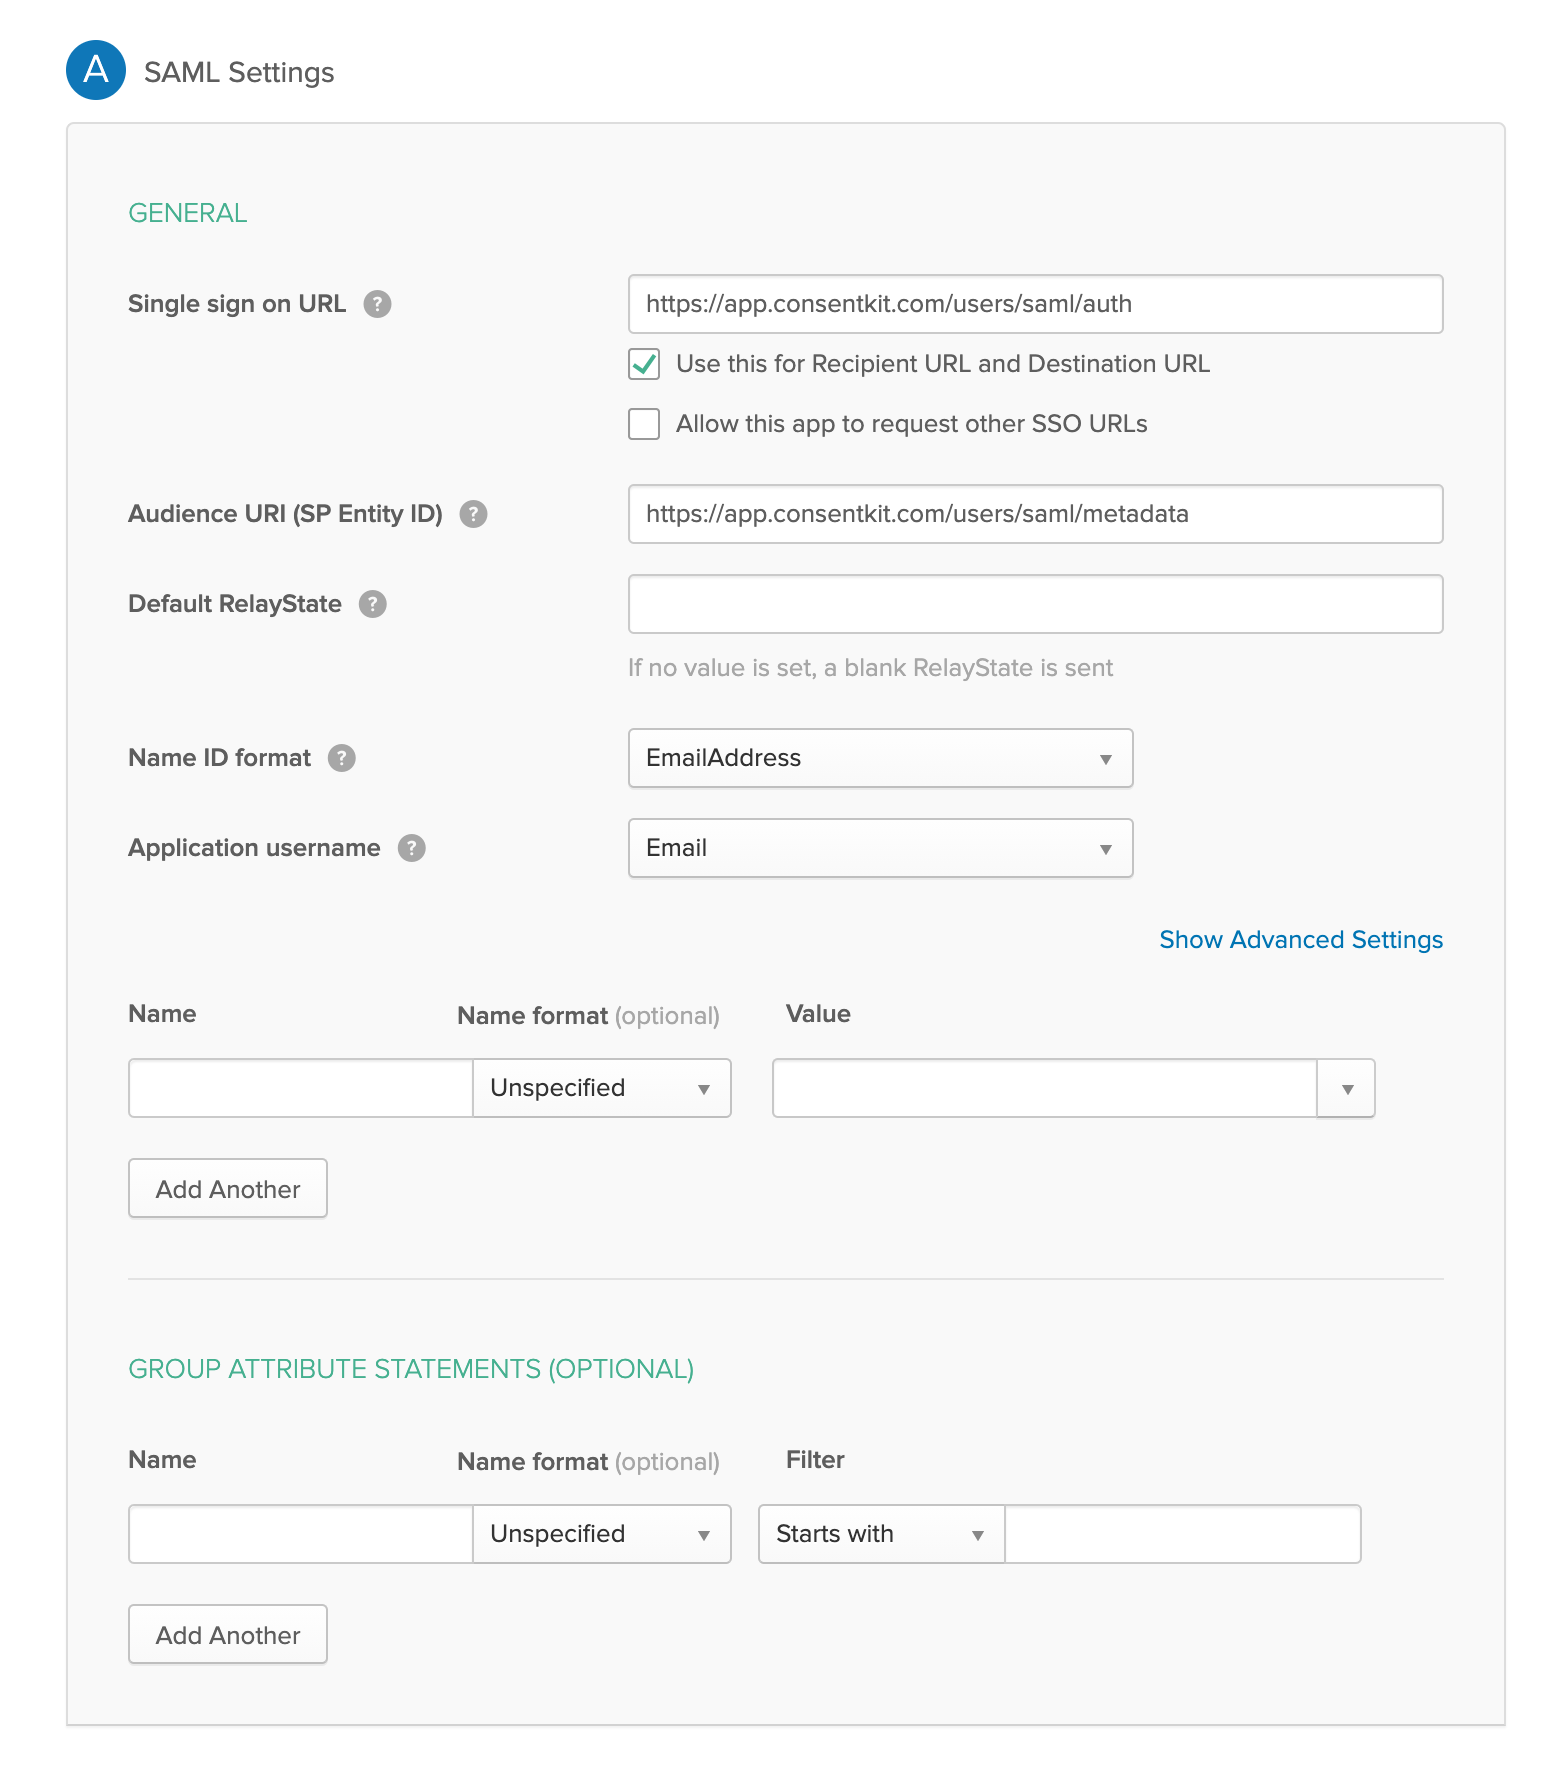
In SAML Settings
-
For the Single sign on URL (Recipient URL and Destination URL) use
https://app.consentkit.com/users/saml/auth -
For the Audience URI use
https://app.consentkit.com/users/saml/metadata - Set Name ID format to EmailAddress
- Set Application username to Email
It should end up looking something like this.

Get the settings from Okta
- In your newly created application go to the Sign On tab and click View Setup Instructions.
- Get a copy of the Identity Provider Single Sign-On URL, Identity Provider Issuer and X.509 Certificate.
Once that is setup then we are one step away from being done.
Enabling SAML SSO within Consent Kit
Option 1 - Enabling within Consent Kit yourself
Once you have the above information, you can enable SAML SSO within Consent Kit by going to Manage team in the top right menu and clicking on the settings tab.

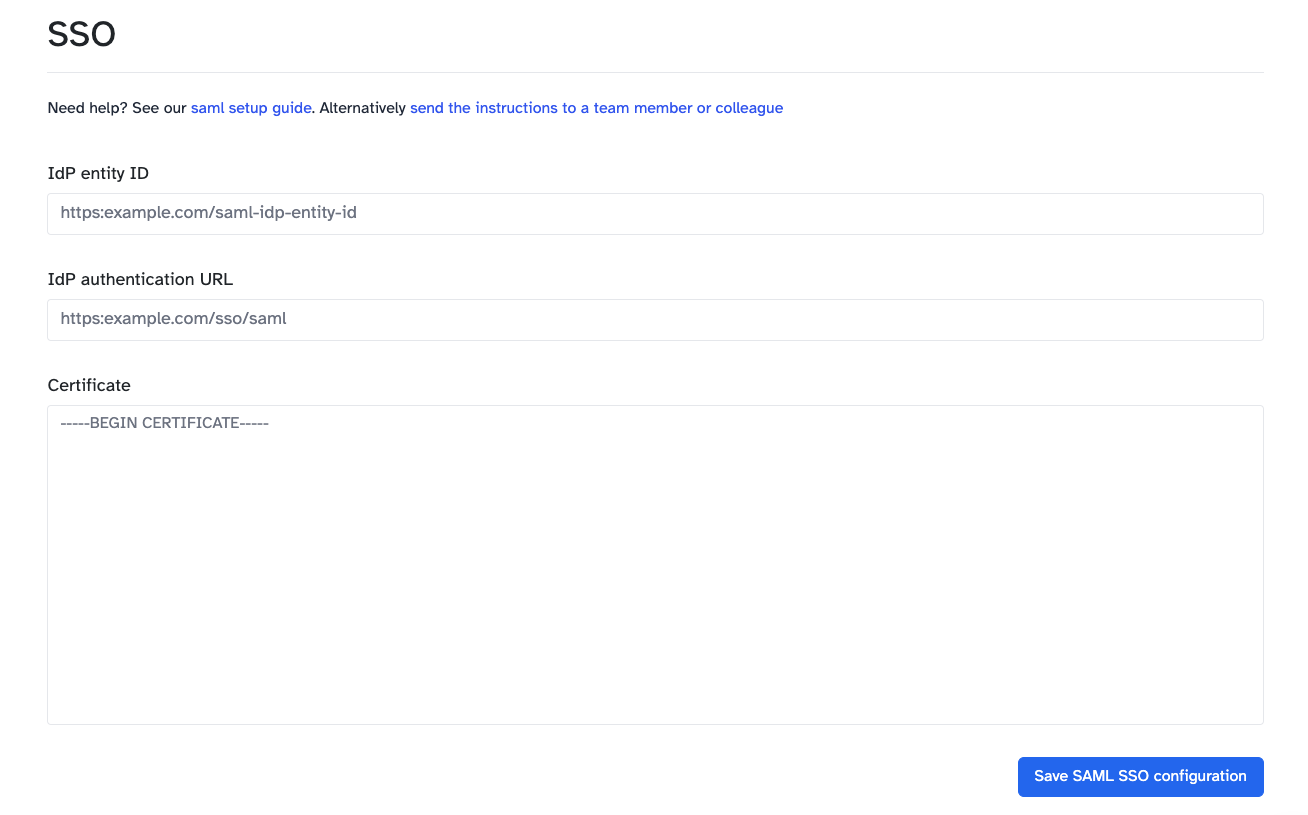
Once you have clicked on the settings tab, you will be able to see the SAML SSO settings. You will need to enter the following information:
- IdP Entity ID: This is your Okta Identity Provider Issuer
- Target URL: This is your Okta Identity Provider Single Sign-On URL
- Certificate: The downloaded X.509 Certificate. You will need to open the file and get the text content of the file to be able to paste it into the form.
Option 2 - Sending the instructions to your IT team
Go to Manage team in the top right menu and clicking on the settings tab then click on send the instructions to a team member or colleague.
This will give you a customisable email template that you can send to your IT team and will contain the information that they need to enable SAML SSO for you.
