Importing data into Consent Kit with a csv
You can easily import your data to Consent Kit from a CSV file. Adding people into a panel is really easy with this method.
We give you sample CSV to practice with and guide how to format your data before uploading.
Get yourself ready for an import
Once you know the data structure the next things to make sure you have right is following our tips on CSV file formatting and making sure mandatory fields are present.
Some formatting tips:
-
Export CSV as Unicode (UTF-8) — We require that the CSV file is exported as Unicode (UTF-8). In some CSV file programs (like Excel) this is not the default, so make sure you export your file as Unicode (UTF-8).
Why do we require Unicode (UTF-8)? It allows for the representation of all characters in all languages, like accented characters and Non-English alphabet characters. Without this format, you may see some characters replaced with a question mark (?) or a box with a question mark inside it (?).
-
CSV file size limit — While there is no maximum limit on the number of columns in the CSV file, the maximum file size is limited to 1mb
Mandatory fields
When importing data to Consent Kit from a CSV file, it’s important to include the fields that are mandatory for each item to be imported successfully. Each mandatory field will have to be on a separate column in your CSV file, and be mapped individually to the field that exists in Consent Kit.
People all require:
- Name
-
Valid email address
Note - Only valid email addresses are accepted. Invalid ones will be skipped and added to the skip file.
Custom fields
If you have additional data you can also easily add it to Consent Kit through the import by specifying custom fields. If the field does not exist in Consent Kit, you can add the field as a custom field before importing any data, so that your data has somewhere to be mapped to.
For example, a person’s ‘age’. In order to successfully include this information in your import, you will first have to create it as a custom field (we recommend text type or single option), before mapping this column to the newly created field.
You will also be able to create custom fields while mapping your fields during importing.
Initiating your import
Once you understand how Consent Kit data works and formatted your CSV file properly, you can start your import.
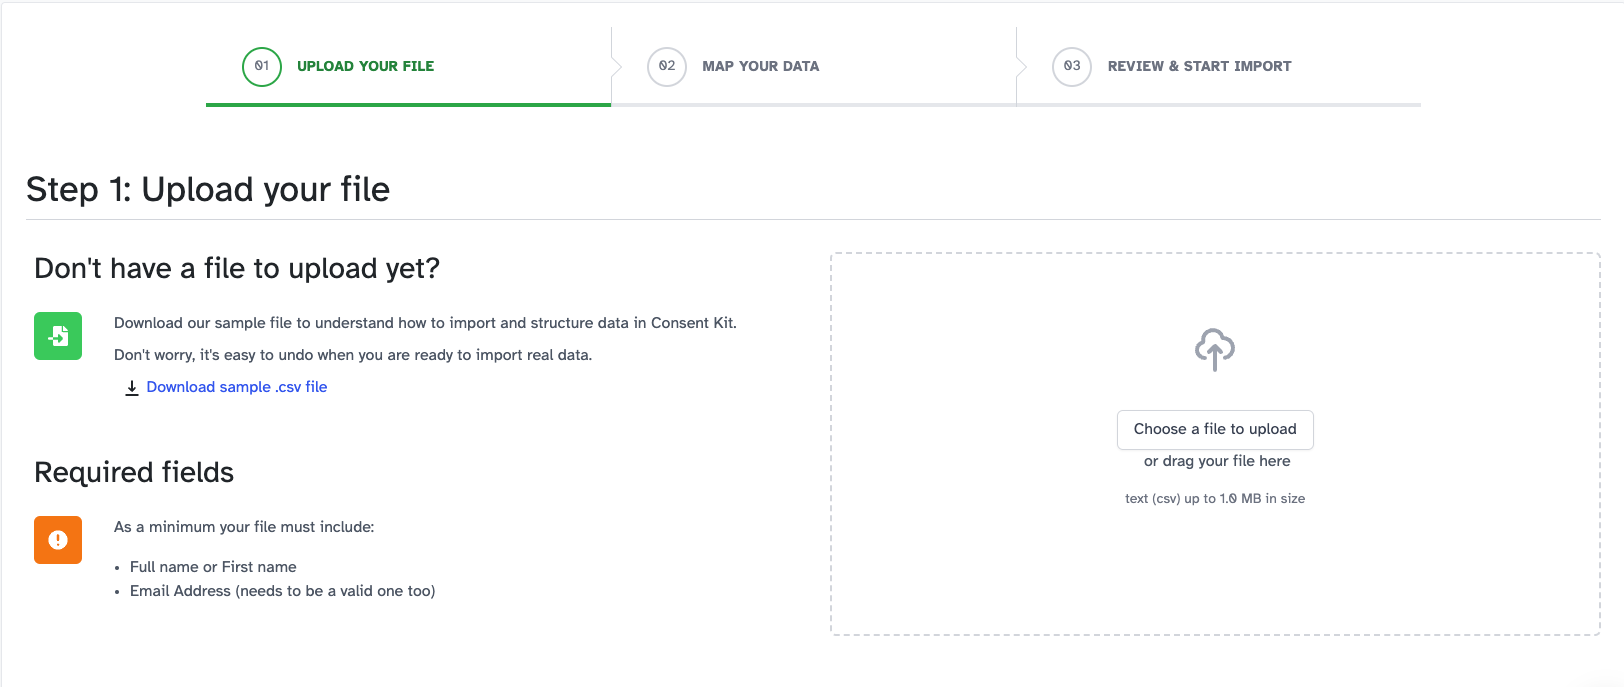
Step 1: Upload your file
To start an import the either:
- If this is yor first import and your panel is empty, select Import from file on the panel page.
- If your panel already has some people in it then use the Add people button in the top menu on the panel page and select Import from file.
You will then be taken to the import page where you can upload your CSV file.
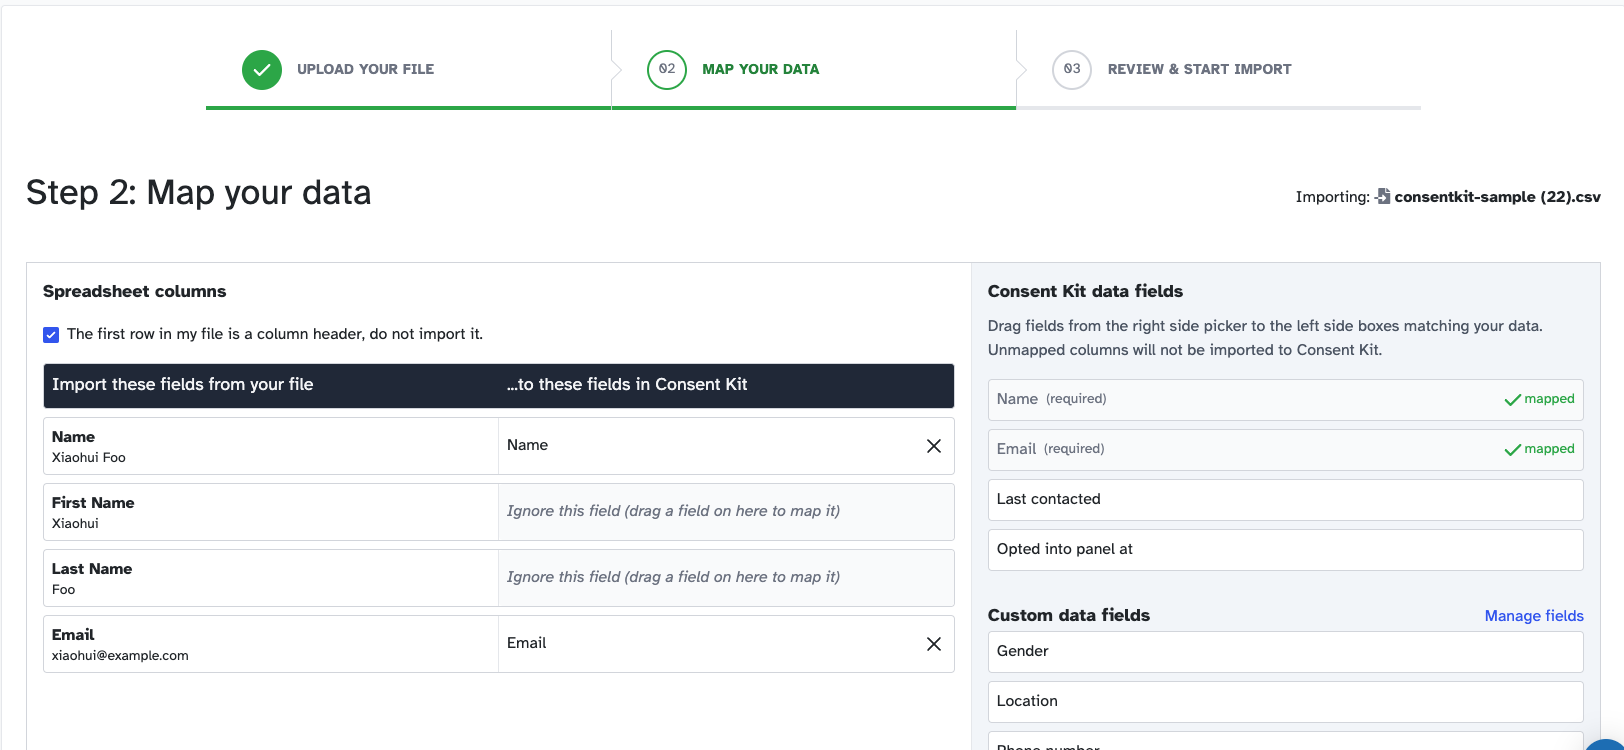
Step 2: Map your data
In order to import your data to Consent Kit correctly, you will need to map each column in your CSV file that you wish to import with the relevant field within Consent Kit.
The auto-recognition feature will try to automatically match the column header to the fields in Consent Kit, but if any of the fields were not recognised, you will need to drag the Consent Kit fields (right) to their appropriate CSV file columns (left).
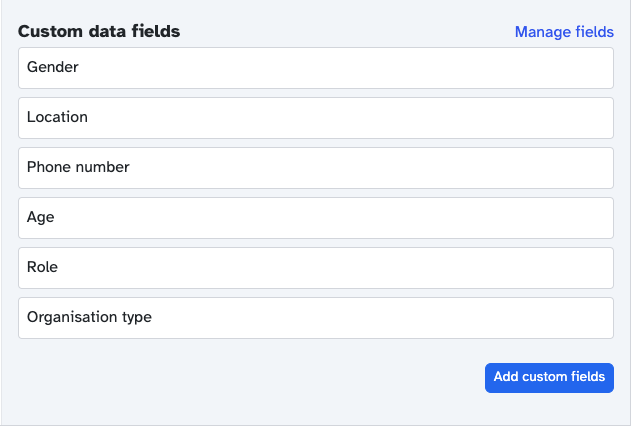
Adding custom fields for mapping
If you have data in your CSV file that you wish to add as a custom field at this point, you can do so by clicking on the Add custom fields button found on the right hand menu at the bottom. Once you have created a custom field it will be available for mapping.
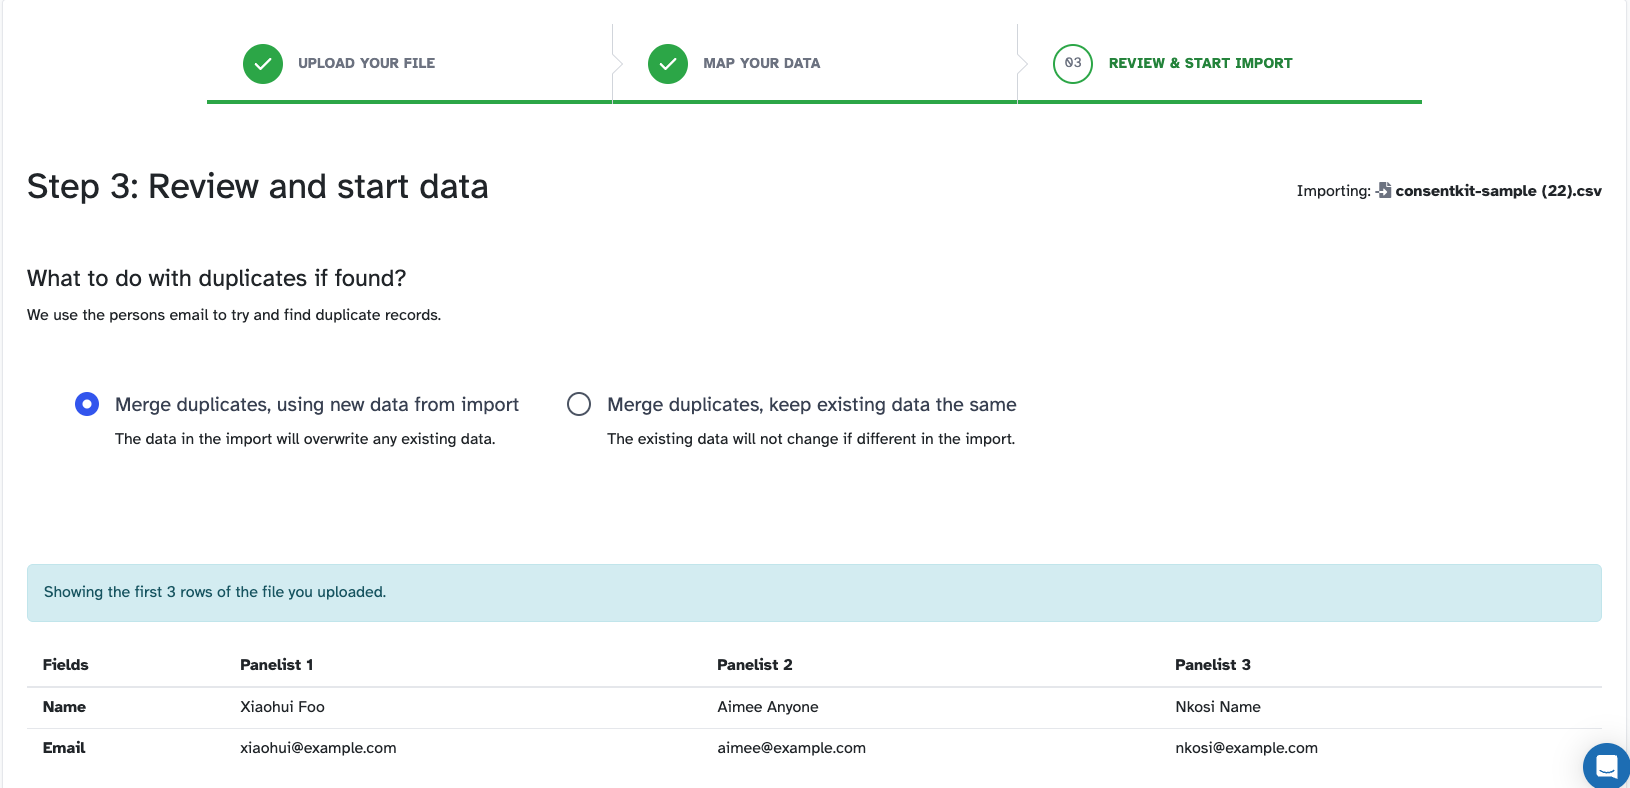
Step 3: Preview and finish
On the next screen, you can choose what to do if duplicates are found in your CSV file. Either:
- Consolidate the duplicate record into one, using the imported values to overwrite the existing ones.
- Consolidate the duplicate record into one, keeping the existing values and only adding new data from the import.
Consent Kit uses the email address to identify duplicates.
You can also review the mapping once you’ve done this step. This page shows you how your data will appear after the import is complete.
Once you’ve previewed your import, go ahead and select Start import.
After your import
After your import has completed and is ready you will see an overview of the data that was imported into Consent Kit.
What is a “skip file”?
If there were rows in your CSV file that were not imported correctly, Consent Kit will create a “skip file”, which includes the row that was skipped and the reason why.
For example, if you were to import a list of People, and didn’t include a mandatory field (e.g. Person email), this row of information will be skipped. Consent Kit will then take that row, and include it in a skip file.
You can download the skip file at any time to review these errors. You can then make the changes that you need directly in this CSV file, and then import the skip file into Consent Kit to complete your import. This makes it very easy to ensure all of your data makes it into the system.
Rolling back an import
Once your CSV file has been imported, it can be rolled back within 48 hours of its initial import. Handy if you make a mistake.