Setup Google SAML with Consent Kit
Step by step instructions on how to setup Google SAML with Consent Kit.
Setup a SAML app within Google Admin
- In your Google Admin console (at admin.google.com)
- Go to Apps > Web and mobile apps
- Click Add app > Add custom SAML app

Configure the custom SAML app
Setup 1 - App details
- Name the app
- Optionally get a copy of our logo to upload
Step 2 - Google Identity Provider details
Download the metadata and keep this. We will be using it later.
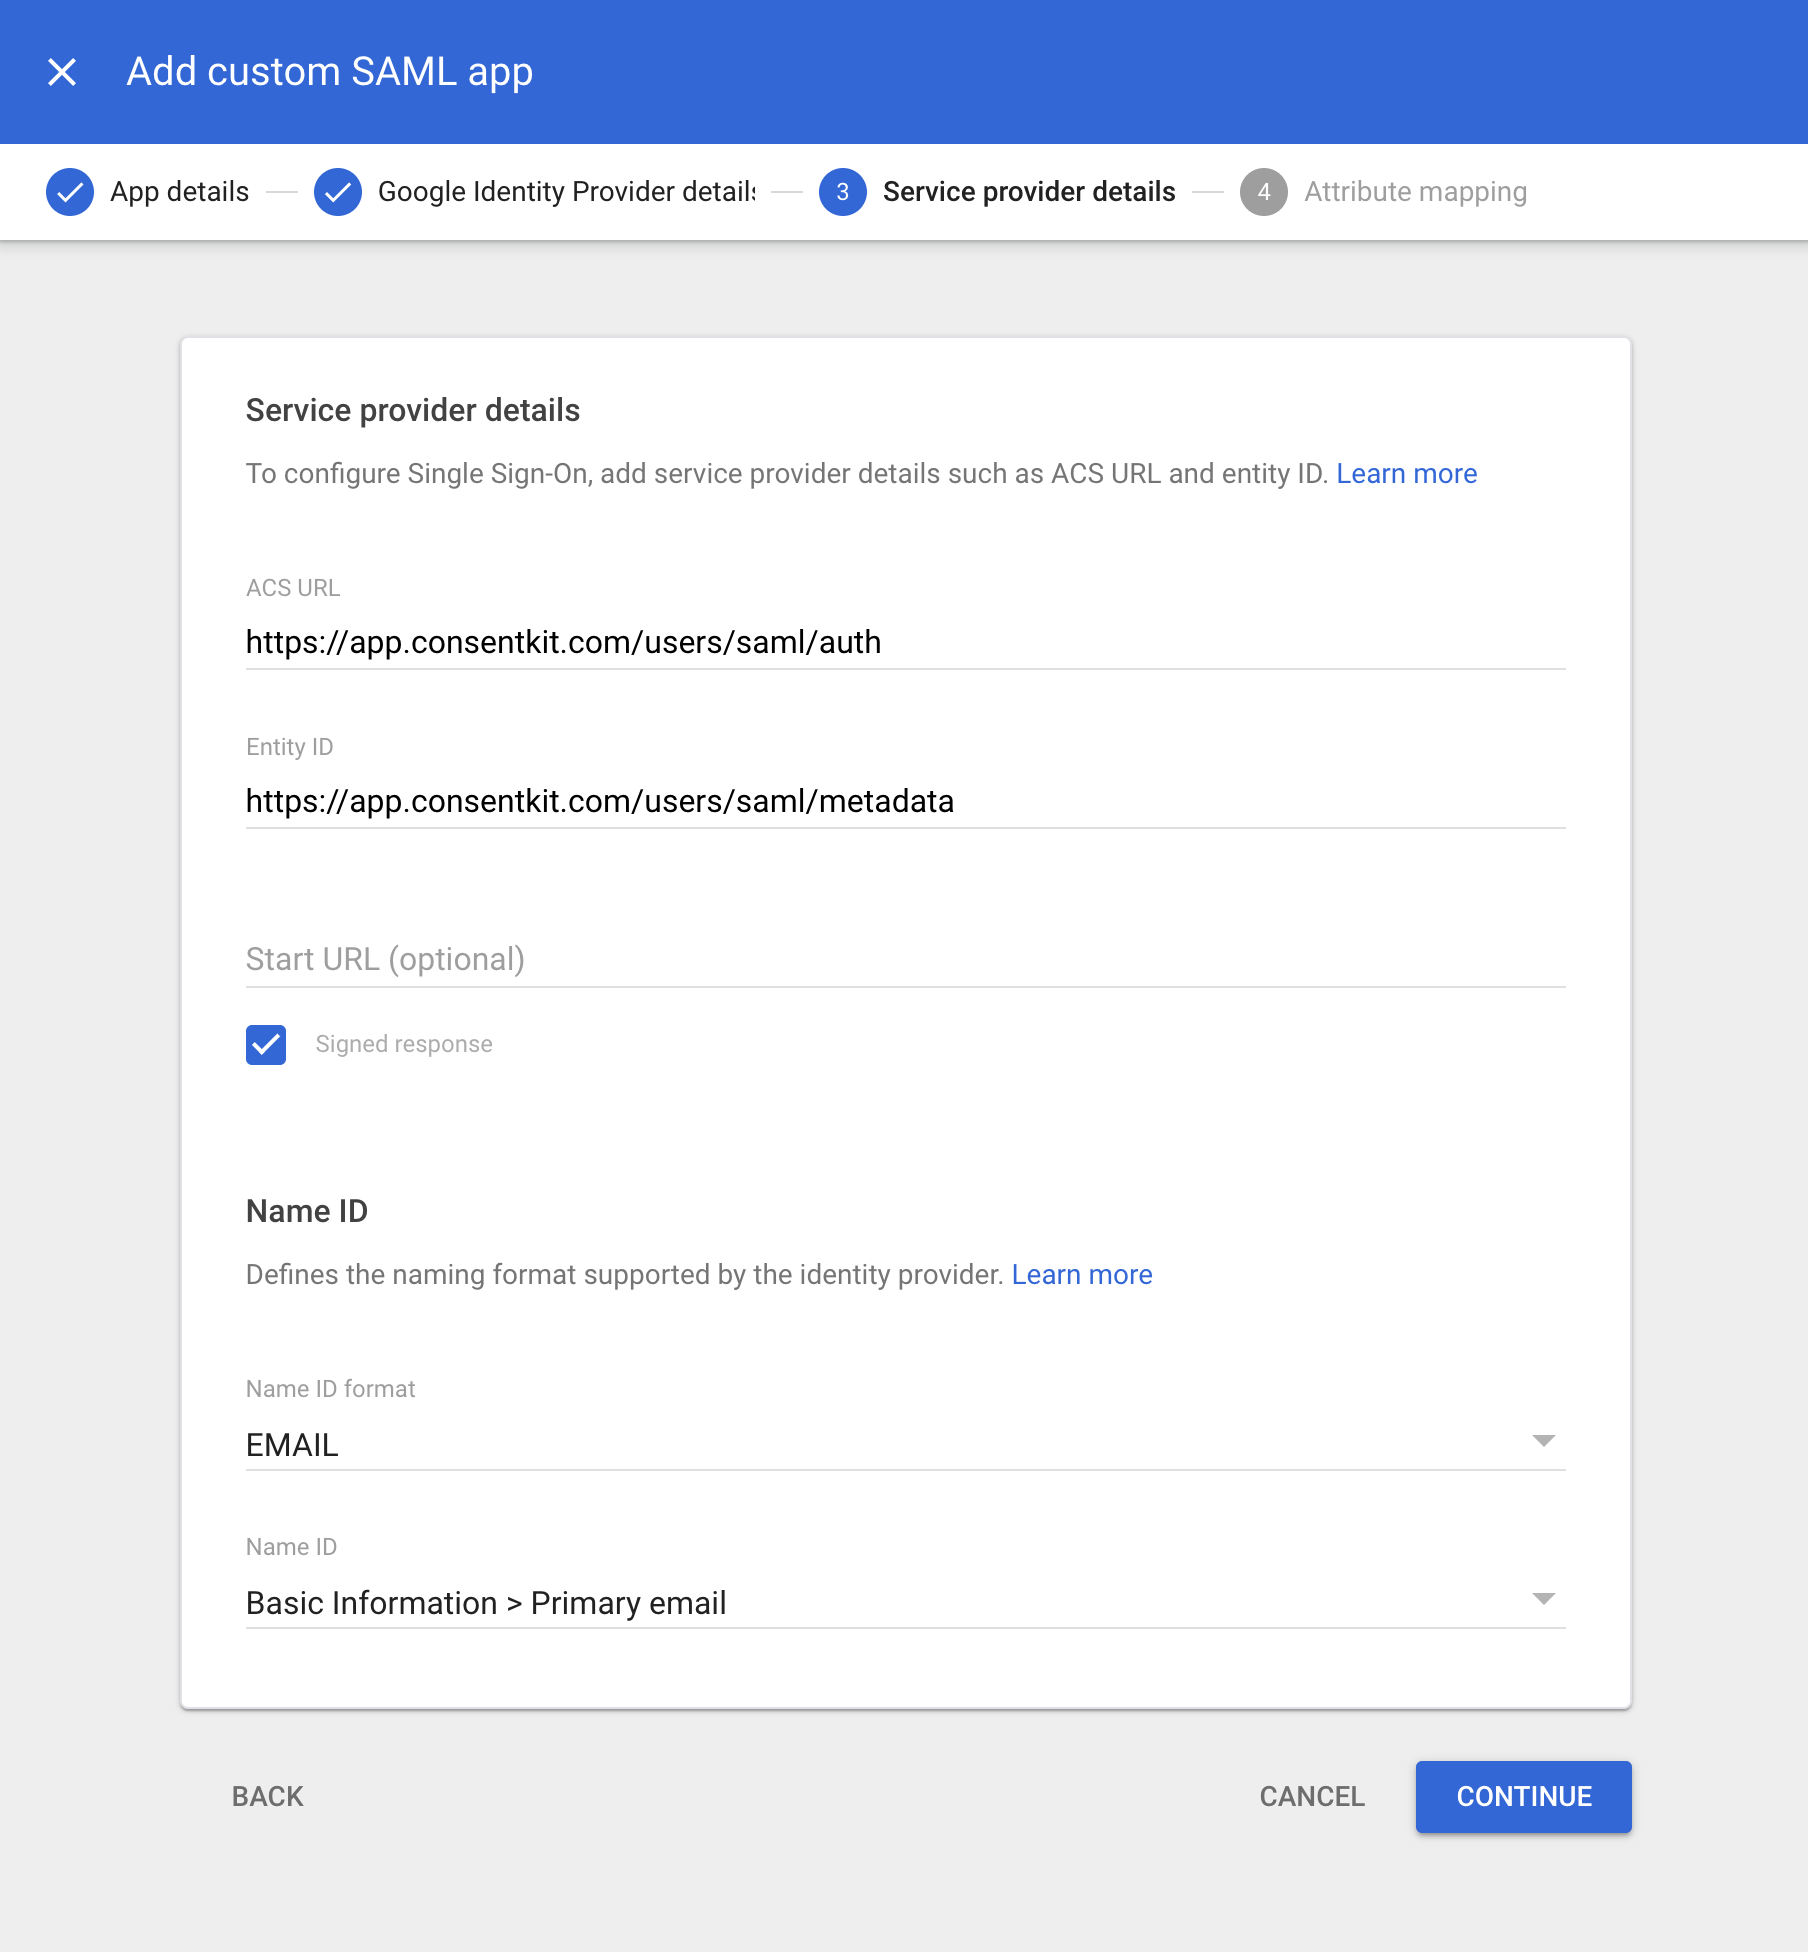
Step 3 - Service provider details
- For ACS URL use
https://app.consentkit.com/users/saml/auth - For the Entity ID use
https://app.consentkit.com/users/saml/metadata - Check Signed response to encrypt the SAML responses
- For Name ID set this to EMAIL
It should end up looking something like this.
Step 4 - Attribute mapping
- Click FINISH
Once that is setup then we are one step away from being done.
Enabling SAML SSO within Consent Kit
Option 1 - Enabling within Consent Kit yourself
Once you have the metadata file, you can enable SAML SSO within Consent Kit by going to Manage team in the top right menu and clicking on the settings tab.
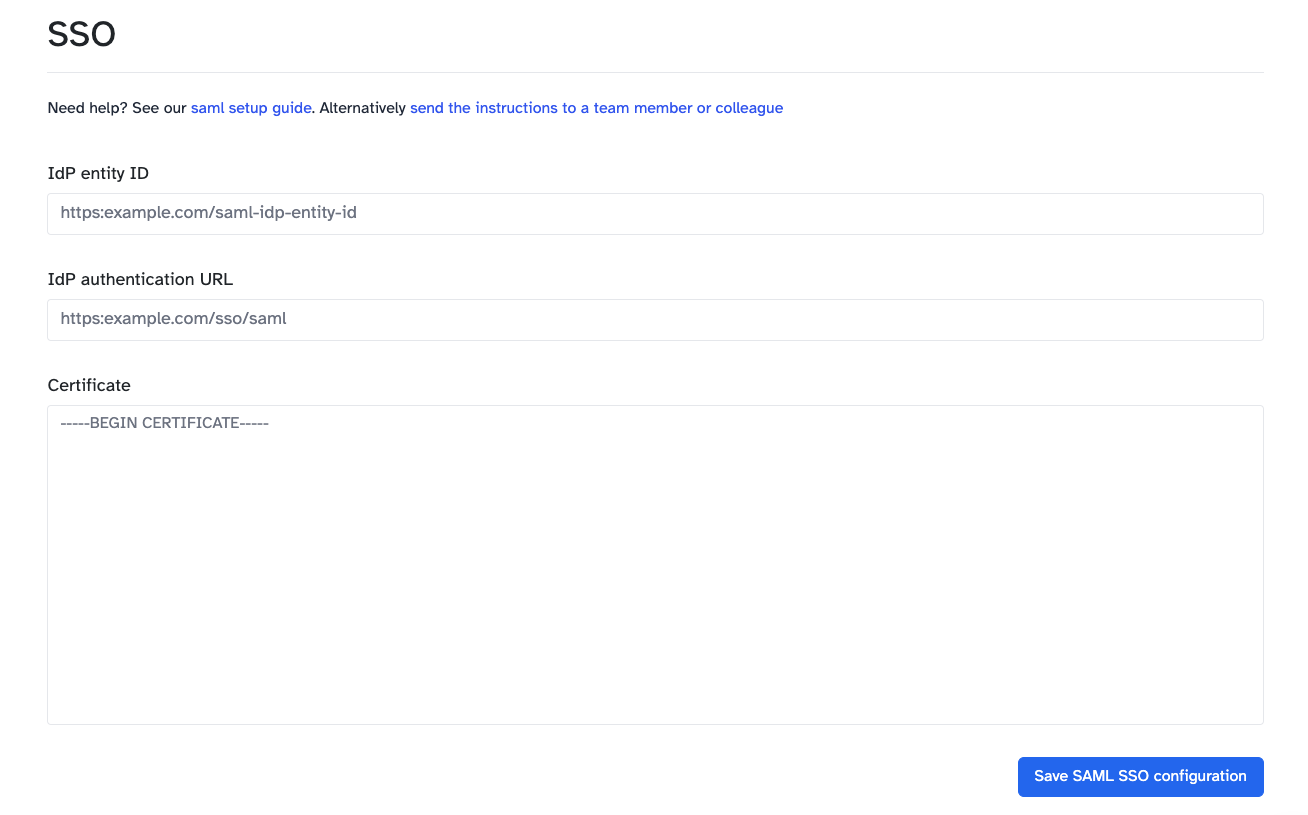
Once you have clicked on the settings tab, you will be able to see the SAML SSO settings. You will need to enter the following information from the metadata XML file (You will need to open the file and get the text content of the file to be able to paste it into the form):
- IdP Entity ID: The
entityIDin the<md:EntityDescriptor>tag from the metadata file - Target URL: The
Locationin the<md:SingleSignOnService>tag from the metadata file - Certificate: The
<ds:X509Certificate>value from the metadata file
Option 2 - Sending the instructions to your IT team
Go to Manage team in the top right menu and clicking on the settings tab then click on send the instructions to a team member or colleague.
This will give you a customisable email template that you can send to your IT team and will contain the information that they need to enable SAML SSO for you.