Setup Entra ID (formerly Azure Active Directory) with Consent Kit
Help setting up Entra ID (formerly Azure Active Directory) with Consent Kit SAML SSO
Note - These instructions assume you have configured a tenant in Entra ID. It may be possible to do this without a tenant but this is outside the scope of this guide.
1. Setup your SAML integration in Entra ID
- Sign in to the Microsoft Entra admin center as at least a Cloud Application Administrator.
- Go to Identity > Applications > Enterprise applications > New application
- Select Create your own application
- Input “Consent Kit” (Or what makes sense) as the name of your app and select Integrate any other application you don’t find in the gallery (Non-gallery). Click Create
- Select Single sign-on from the left hand menu
- Select SAML then edit the Basic SAML Configuration section
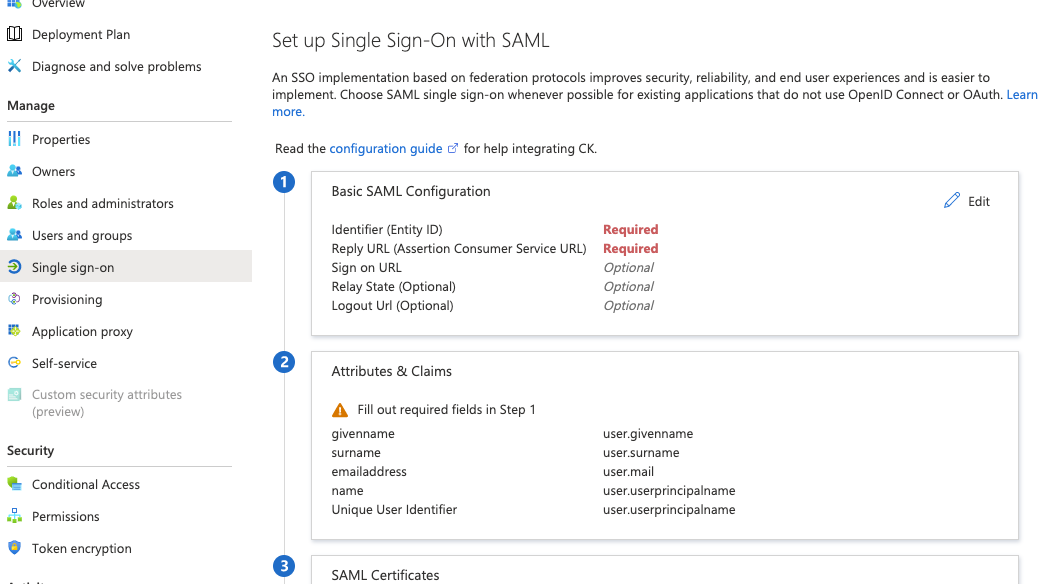 In the Basic SAML Configuration section, enter the following values:
- Identifier (Entity ID):
https://app.consentkit.com/users/saml/metadata - Reply URL (Assertion Consumer Service URL):
https://app.consentkit.com/users/saml/auth - click Save
- Identifier (Entity ID):
2. Get the settings from Entra ID
On the same screen as above:
- Download the Certificate (Base64) file
- In section number 4 make a note of the Login URL and the Microsoft Entra Identifier
Once that is setup then we are one step away from being done.
3. Enabling SAML SSO within Consent Kit
Option 1 - Enabling within Consent Kit yourself
Once you have the above information, you can enable SAML SSO within Consent Kit by going to Manage team in the top right menu and clicking on the settings tab.
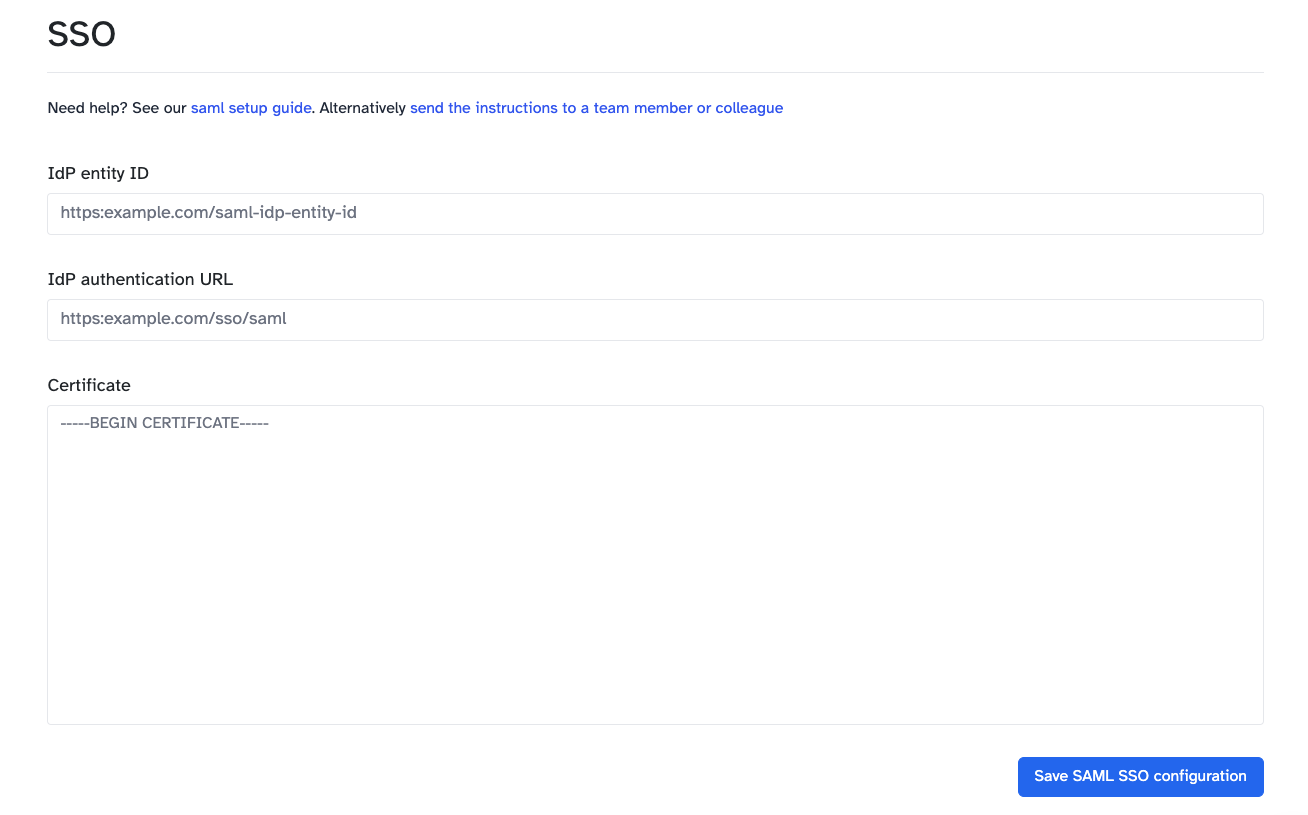
- IdP Entity ID: Enter the Microsoft Entra Identifier from step 2
- Target URL: Enter the Login URL from step 2
- Certificate: The downloaded Certificate. You will need to open the file and get the text content of the file to be able to paste it into the form. Right-click on the file and open with a text editor like Notepad or TextEdit.
Option 2 - Sending the instructions to your IT team
Go to Manage team in the top right menu and clicking on the settings tab then click on send the instructions to a team member or colleague.
This will give you a customisable email template that you can send to your IT team and will contain the information that they need to enable SAML SSO for you.