Research Ops
Research Panel Management - The Complete Guide to Building and Managing Research Panels

Written by: Phil Hesketh
Published on: Last updated:
Learn how to build and manage a research panel to collect valuable insights as your business grows—without outsourcing panel management to expensive agencies.
FACT: Speed is your company’s advantage for growth. But with that comes the need for fast and accurate data to inform the decision-making process.
But there's a catch... To obtain that data, you need to conduct necessary research, and that typically means building a research panel.
In the guide below, you'll learn exactly how to do it and how to manage your research panel once you've built one.
Intrigued? Let's take it from the top, then.
What is a research panel?
A user research panel is a group of pre-qualified participants that you can reach out to whenever you need to undertake UX or market research for your company.
Instead of having to track down new people to interview for every item on your research to-do list, you can simply send them a message and request their feedback through interviews or surveys.
Your willing participants will be selected based on their ability to make informed, thoughtful, and relevant contributions to your questions—so you need to ensure quality over quantity when you’re creating your panel.
What are the benefits of creating research panels?
There are multiple benefits for companies that create their own research panel. These are the most tangible ones.
Time and cost savings
If you need to carry out any kind of research, your options are limited to either outsourcing to a specialist research agency, or undertaking everything yourself.
The first will save you a lot of time, but cost a ton in fees. And the second will obviously save you the fees, but could potentially take up weeks of your team’s time and resources.
Managing your own panel is the sweet spot between these two options, as you essentially have qualified participants on “speed dial” when your company wants to carry out research initiatives.
More accurate data
Building a research panel means the information collected by your UX researchers will often be more reliable than hiring an outside research agency.
Your panelists will be professionals and subject matter experts that understand your industry, any nuanced jargon, and the technicalities of your product or service.
This makes it exponentially easier to run research that can provide actionable solutions for even the most complex and specific problems. Faster insights.
Your research panel eliminates the need to search far and wide for the right participants to screen and survey for your studies.
Picking selected participants from your panel to participate in online surveys can quickly provide you with targeted sample data in days, if not hours.
Increased response rates
As all of your panel members have opted in to participate in research initiatives, you know that they’re eager to help, and genuinely want to partner with you to create better products and services.
This means response rates will always be higher than if you carried out research with one-off participants in the field.
Richer insights
By carrying out research with a panel, you’ll get to know this group of people on a deeper level over time, and build out robust participant profiles.
The detailed information you collect about each person will enable you to carry out highly-targeted research with more specific groups of people within your wider panel.
Now you know the many useful benefits of research panels—it’s time to build one!
How to build a market research panel: Step-by-step guide
1. Decide on the panel size
Choosing your target panel size before you begin is important for three reasons:
You want to ensure you have enough people for your big research initiatives
You need to be able to create smaller panels out of the main group for targeted research
You don’t want to burn people out by contacting them too much
Start by considering your ideal sample size for research, the required response rate, and how many studies you’re intending to carry out over a set period of time.
You might need to think about a wide range of things like demographic and geographic quotas, plus age or income brackets, to ensure you collect the best data possible.

A good rule of thumb for determining panel size is to aim for 20% more panelists than your minimum required number. This will ensure you’re covered if people decide to leave your panel, or you’re struggling to get people to respond for any given study.
2. Define panel management responsibilities
Once you’ve done the groundwork of setting a panel size to aim for, you’ll need to decide who’s going to be in charge of building and managing this so everything runs smoothly. Your research panel is a valuable business asset, and you need to treat it as such.
You’ll need to think about tasks such as:
Recruiting new panelists
Communicating with panelists
Managing and updating the panelist database
How to pull out the right people for a study based on specific criteria
Marketing initiatives
Creating screeners
Creating and running surveys
Obtaining informed consent for each project
Scheduling research sessions
Running interviews
Analyzing participant responses
Incentive programs
Internal communications
Data governance and security
Removing low-quality panelists
Profiling high-quality panelists for future recruiting efforts
Assigning roles and responsibilities for panel management ensures that you can develop good relationships with your panelists, keep information current, and collect the most accurate data possible for each study.
3. Develop participant personas
Your research panel should essentially be a microcosm of your entire customer base. You should also think about how to implement customer segments (or personas) within the panel.
Segments will have a bearing on your overall panel size, as you’ll need to consider how many people will match each persona, and the research demands for participants from each segment.
Within your group of “ideal users” you’ll need to consider a wide range of factors to reduce any potential biases, and ensure you collect usable data.
If you’re building a panel from your existing user base, you might want to segment your panelists by things like:
How long they’ve been a customer
Which plan they’re on
Whether they use your product daily, weekly, monthly, or less
Whether specific users could skew your data collection in any way (e.g. do they have specialized knowledge about your product or industry that most users don’t?)
Are they a brand mega-fan that might just tell you what you want to hear instead of giving constructive feedback?
Whether they have undertaken a previous research study (or multiple studies) with you?
Once you’ve defined what your ideal panelists look like, it’s time to create your recruitment survey to help prospective panelists self-select whether they’re a good fit or not.
4. Create a panel recruitment survey
A recruitment survey is the most efficient way for your team to recruit people that closely match the personas you’ve developed.
This survey should be as short as possible (keeping to the GDPR principles of data minimisation), while enabling you to quickly qualify or disqualify each person from joining your panel.
Don’t worry, it’s not as tricky as it sounds, and you can use a single survey for everyone, whether they’re a current customer or someone you’ve never met.
First, you’ll need to think about essential questions that disqualify potential panelists. These could be:
Whether people are customers/employees of your competitor(s)
Where people live (this ensures you stay compliant with country data laws)
Income bracket
Age
Occupation
Once you’ve decided on your must-have screener questions, you’ll need to include a few questions that help build out each panelist’s profile. These questions should be decided on by relevant internal team members.
If you’re swamped by a pile of questions from different teams, these profile questions can be given preference in terms of “must know” and “nice to know” data to ensure your survey doesn’t get too long.
Remember that you only need to collect basic data at this point—you can build out more detailed profiles later on.
5. Define recruitment channels
There’s a wide world of panel recruitment channels available to you if you don’t have enough customers to reach your desired panel size, or if you want to collect insights from people who aren’t existing users.
These include:
Social media
Website visitors
Emails
SMS
Industry events
Referrals
Advertising campaigns
Affiliates
Whichever channel(s) you choose, make sure they have plenty of traffic that matches your ideal panelist personas, and that they’re in line with your budget for building a research panel.
6. Start recruiting
Contact your potential participants with invitations to join your research panel. Describe what you’re intending to do, and how their input will be valuable to your organization.
Keep this brief and informative. You can mention your incentive program, but remember this is an invitation—not a sales pitch.
We recommend sending these invitations to small groups of users first so you can iterate on things as you go. Once you’ve got any problems ironed out, you can send invites to the remainder of your hopeful participants.
7. Get consent
To ensure your research panel is compliant with data protection regulations in your country or state, it’s essential that you get consent from each panelist to collect and store their personal information.
You’ll need to get consent when a person agrees to join your panel for the purposes of recruiting for research, and you’ll need to ask for consent again when they agree to take part in a specific project.
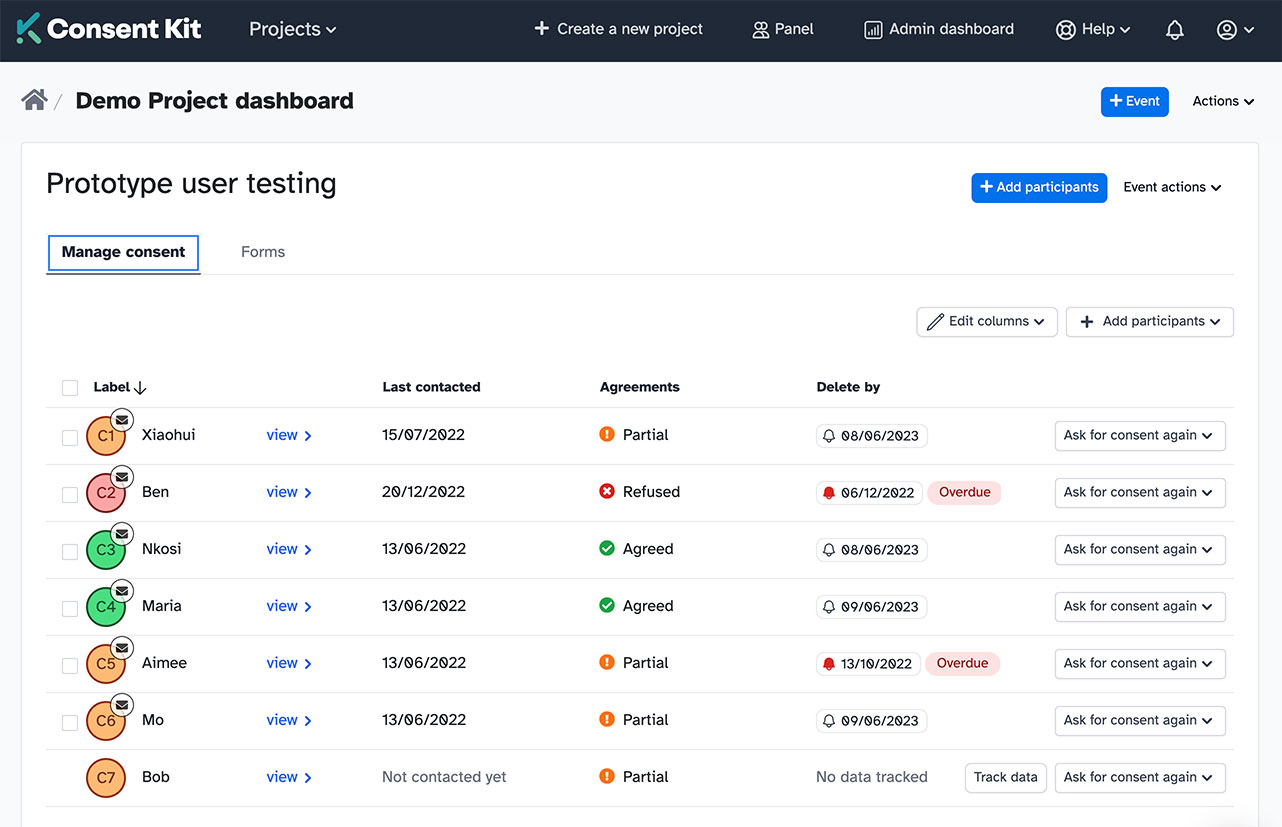
Consent Kit provides consent management across both of these use cases and makes the entire process fast and simple for both your teams and your participants.
Ensuring transparency around data will help build trust with your participants, and you can also share control over this data with them if they decide to change their information or withdraw consent at any time.
8. Schedule research sessions
Congratulations—your research panel is ready to go! All you need to do is filter your panel to get the ideal participants for your first round of research and invite them in.
Send out branded invites for your survey or interviews, asking people to either complete the survey or schedule a suitable time on your calendar for a 1:1 chat or walkthrough.
Set clear expectations in your invite about the aim of the research, how long it will take, and what will happen next.
It’s normal for some panelists to decline invites, so keep sending these out to more panelists until you’ve reached the desired amount of responses.
This is why you factored in a slightly larger panel size all the way back in step 1 of our guide. All of your advanced planning will now pay off!
Tips for research panel management
Now you’ve put everything together, you need to ensure you manage your panels properly to keep your participants engaged, and ensure the quality of your research remains high.
If you’re not intending to use panel management software to guide you, you’ll need to think about ways to approach the following elements.
Set expectations
When you’re reaching out to new panelists, it’s important to give them information up front about what to expect when they work with you, and how often they will be contacted to participate in research.
You can use multiple touchpoints to do this, such as:
An initial profile questionnaire
A login portal on your website
Welcome email
Invitations to new projects
Managing expectations is critical so that you don’t burn out your panelists, or leave them feeling unprepared for what comes next.Consent Kit (and other leading tools) have configurations that give participants a rest period after they’ve taken part in research.
For example, you can set parameters so that participants don’t show in search results if they’ve taken part in a project within a specified number of days (typically a 30-day window).
It can be helpful to provide your new panelists with a FAQ that answers common questions like:
What to expect as a participant
Contact frequency
What’s in it for them
What happens to their feedback
How to opt out if they want to
Your FAQ should be regularly updated to include the most common questions you get asked over time. This will save your panel management team time, and give new panelists everything they need to opt in to your research with confidence.
Keep things personalized
Your research panel doesn’t need to be boring. Creating a personalized experience for each panelist shows the human face of your company, and helps participants to feel like a valued contributor, rather than just a demographic.It also helps to drive up your response rates!
Think about ways you can delight your participants. For example:
Add a few fun questions into their profile survey to get to know each person (You’re stranded on a desert island with your favorite food—what is it?)
Send a personalized welcome email to them, thanking them for agreeing to be part of your panel.
Reward them in a relevant way for their time and effort.
Take the time to regularly remind them how their feedback is helping you build a better product or service.
Keep things as simple as possible for them during their time on your panel.
It’s important to think about the personalization aspect and tone of voice in context-specific ways to include your panelists who may be vulnerable, or have specific needs that should be taken into consideration.
Create an incentive program
Incentives will help you attract the right panelists and keep response rates high. It’s polite to reward people for the time and effort they spend helping your company—and it’s more inclusive, as not everyone can afford to take part in research if they need to take time off or have travel expenses to get to you.
However, panel incentives can be tricky to get right.
It’s important that any incentives you offer participants are both relevant and valuable. It’s also important that you think about how any gifts will be perceived by your panel members—so consider carefully who your target respondents are before making any decisions about rewards.
Would they prefer:
Cash (bear in mind that high income earners will need a high cash incentive)
Charity donations on their behalf
Company swag
Gift vouchers
Gift baskets
Note that many employees aren’t allowed to receive rewards or gifts, so you’ll need to think about what would make sense in that case. Once you’ve thought about what to incentive with, you need to think about when you’re going to do this.
As your research panel is ongoing, you need to decide whether you will:
Offer a reward every time a panelist takes part in research
Offer a reward to eager panel members who’ve joined but never been matched to any of your research initiatives
Offer different rewards for people who undertake lengthy interviews vs. people that complete a quick survey
Incentive programs that seem like a great idea at the outset can become a financial drain on your company over the long term, so it’s important to put a lot of thought into your rewards program up front.
There can also be tax implications with incentives. In the United States in particular, companies need to inform the IRS if a non-employee has received more than $600 in income that year. Incentives for research might cost you $50 to 100 per panelist, so that is easily obtainable in a calendar year.
Keep your panelists informed
Everyone likes to feel that they’re making a difference when they contribute to research. As well as offering incentives, it’s also important to let your panelists know that their feedback, time, and effort have been put to good use by your company.
Share the research results with your panel members, and inform them of how you’ve used, or are intending to use, their responses.
This will make your participants feel more invested in your company’s research, and keep them interested in future research rounds.
Track panelist activity
Maintenance is a key part of research panel management. Keeping track of your participants’ information and activity is essential for a healthy, engaged pool of contributors.
Your panel management team needs to stay informed about:
Personal information - Have your panelists recently moved, changed jobs, changed their email address, become your customer, or left to become a customer of your competitor?
Contact frequency - Have some panelists been forgotten about? Or have you contacted them so often that they might be feeling annoyed or burned out? Make sure you set an upper limit on contact frequency.
Participation - How responsive are your panelists? Are they highly engaged, or do they delete every survey without even opening their emails?
Feedback - It can be helpful to keep ratings for each participant after every research round. Did they provide useful feedback? Would you reach out to them again?
Incentives - Have you rewarded each panelist as you promised? How much have you paid out to them in total? It’s important to set an internal cap for paying out rewards so you don’t go over your budget (or exceed tax thresholds) for incentives.
Maintaining your panel ensures that you keep your response rate up, and that you’re talking to people who actively want to participate in helping your company succeed.
Wrapping up
Building a research panel can provide your organization with an eager and qualified group of participants that can help you gather accurate data to drive important business decisions—at a fraction of the cost of outsourcing research.